To integrate Nifi with an Azure Key Vault follow the below steps
Step 1 – Add Parameter Provider
Go into Controller Settings -> Parameter Providers and add an AzureKeyVaultSecretsParameterProvider as below
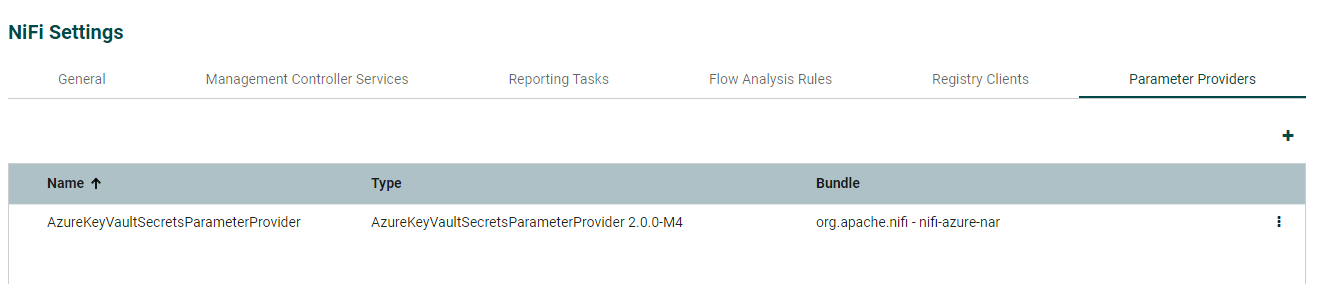
For Azure Credentials Service select create new service.
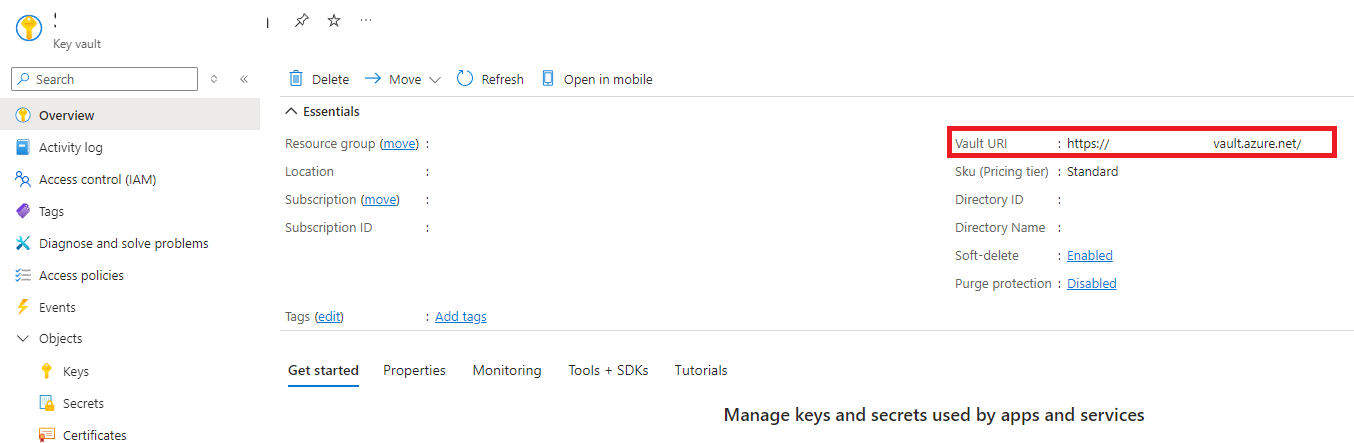
Add your key vault URI which you can find on the overview page in Azure of your keyvault as shown in the 2nd screen shot below.
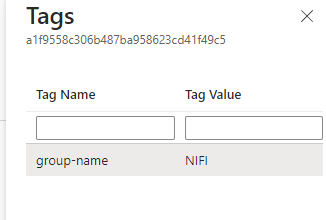
For the Group Name Pattern, this refers to tags you must add to your secrets in the keyvault (including when you refresh/change a secret)
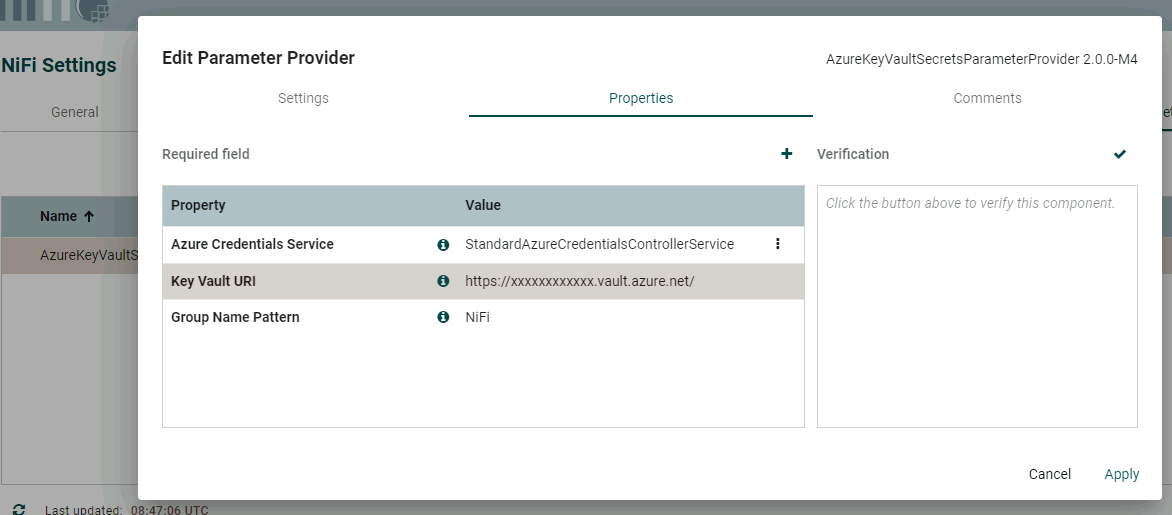
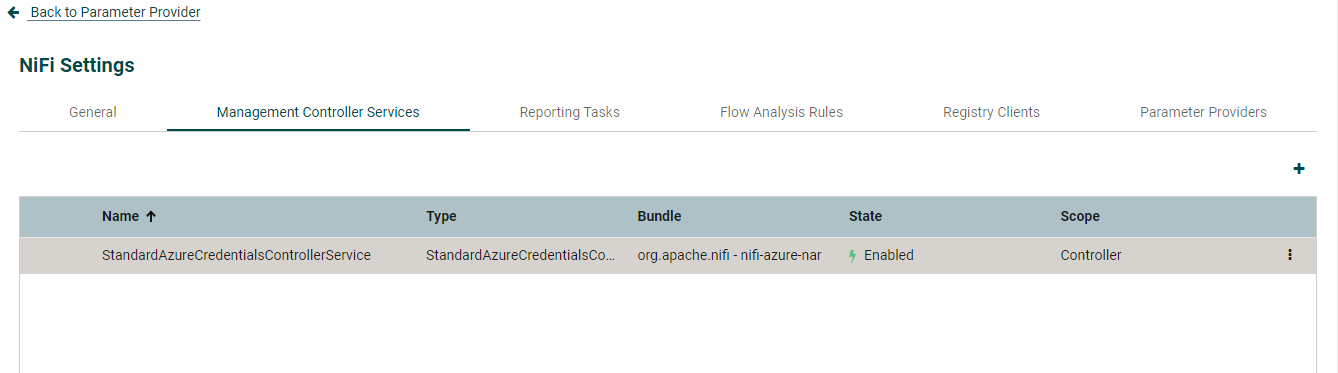
Step 2 – Edit Controller Service settings
Go into Management Controller Services and edit the Controller service you just created
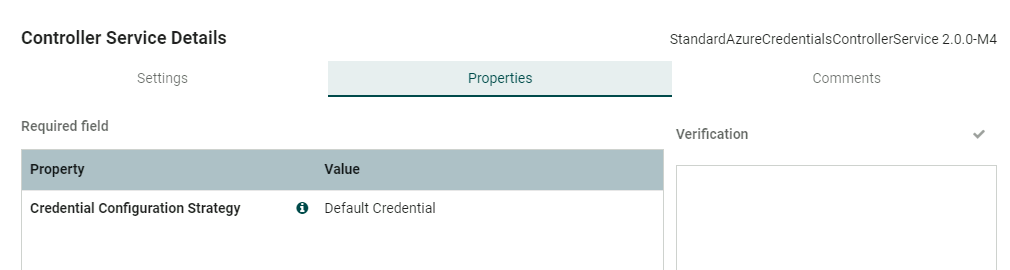
It will be set to Default Credential to start which means the server it is on must be an Azure resource (VM) which is granted List, Get permissions on the Azure Key Vault. If you wish you can change the setting to Managed Identity and specify a managed identity.
Step 3- Fetch Parameters / Secrets
Now you can go back to the Parameter provider you created in step 1 and select the 3 dots. Then select Fetch Parameters
Select the Group Name tag you specified, then this will show you the secrets in the Azure Key vault you wish to import. If you set as sensitive you can only use in sensitive enabled fields in Nifi processors (caution). Then click apply.
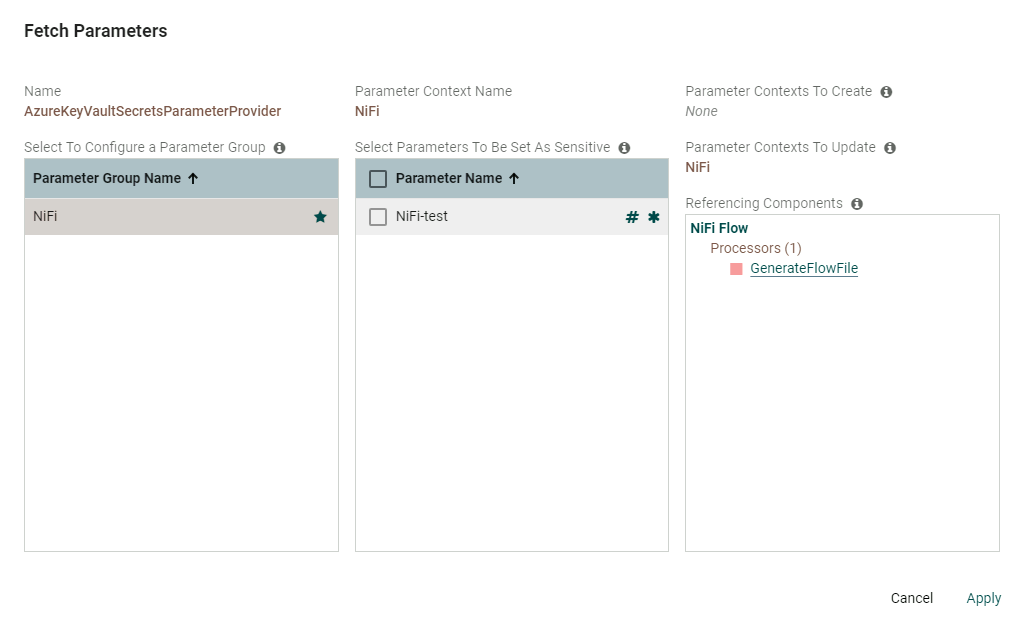
If you wish to refresh the secrets you can follow Step 3 again and click apply. The middle column above shows a Star next to the parameter name which shows their is an update in Azure.